



How to set up Google Search Console
Google Search Console is the foundation of any SEO strategy. Here's how to set it up properly, step by step.

In this article 3 sections
Did you know that Google Search Console is an essential tool for any SEO strategy? With it, you can monitor how Google sees your real estate website, see which keywords are driving traffic and spot possible indexing errors.
In this video, Lluís Jiménez, head of SEO at Landing Agency, explains how to create a Google Analytics 4 (GA4) account and a Google Search Console account, and how to set them up step by step to start measuring your real estate website's performance and improve your visibility on Google.
What is Google Search Console?
Google Search Console (GSC) is a free tool that lets you analyse how your website appears on Google and assess its health from a technical SEO point of view. With GSC, you'll get key information on how your pages perform in search results and how users behave on your site. This data will help you improve your page's visibility and win more traffic from Google, which is crucial for attracting potential buyers and sellers in the real estate market.
By signing up to Google Search Console you'll be able to, among other things:

- Analyse your real estate website's performance on Google.
- Check which pages on your website Google has found and indexed.
- Submit sitemaps and specific URLs for Google to index.
- Identify errors affecting your website.
How to set up Google Search Console for your real estate website
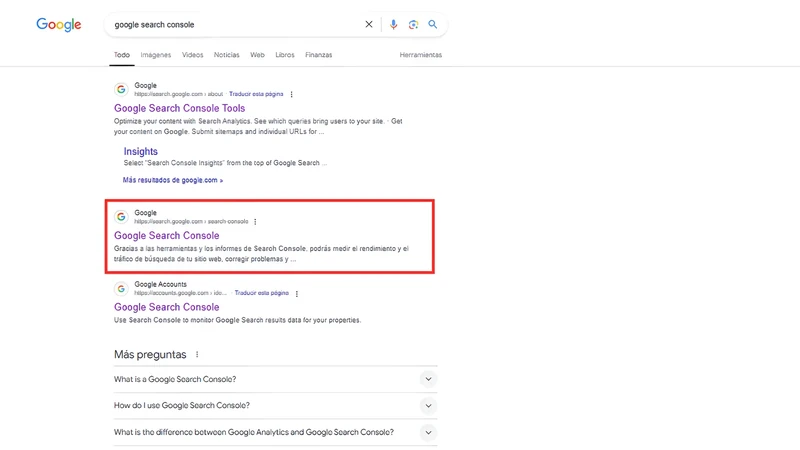
The first step is to search for “Google Search Console” on Google. Make sure you don't click on any sponsored links, as we want to go straight to Google's official site. Once you've identified the right link in the results, which is usually labelled with the “google.com” domain, click it to go to the Google Search Console home page.
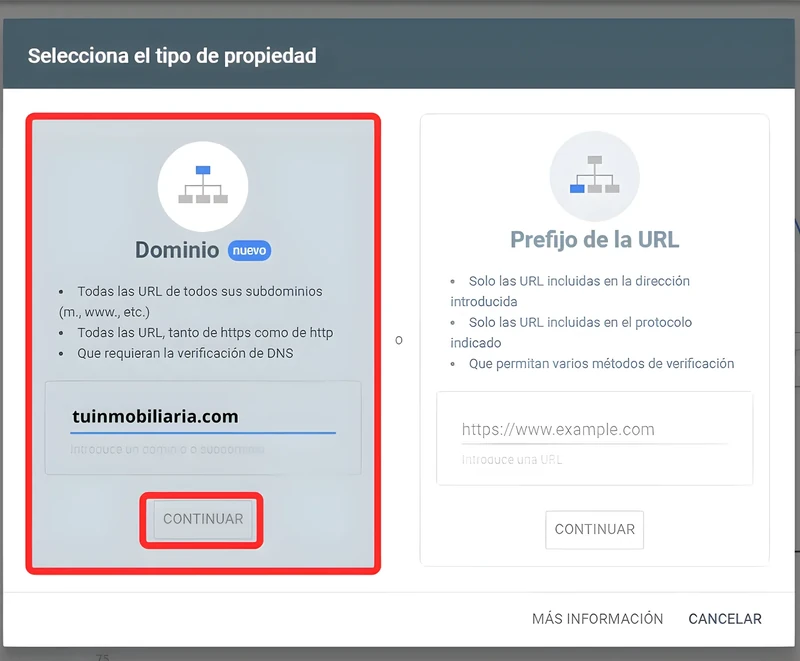
Next, once you've clicked through from the search results to Google Search Console, you'll see this panel, where you can choose between adding a Domain or a URL prefix.
The URL prefix option is useful if you want to analyse data for a specific section of your real estate website, such as the blog, where you share relevant content to attract potential buyers or sellers.

In this article, however, we'll focus on adding a domain property, so you can track every URL across your entire domain, giving you a complete view of your real estate website's performance in search results.
Adding a domain property
Adding a domain property in Google Search Console gives you a complete view of every page on your website, regardless of whether they use variants with or without “www” or different protocols such as HTTP or HTTPS. This kind of setup is ideal for making sure you're monitoring your whole domain comprehensively.

To complete the process, you'll need to verify your property through your DNS (Domain Name System) provider, which means confirming that you own your domain.
The first step is to type your domain into the “Domain” option, without “http://”, “https://” or “www”. For example, if your website is https://www.tuinmobiliaria.com, you should just type “tuinmobiliaria.com” and then click “Continue”.
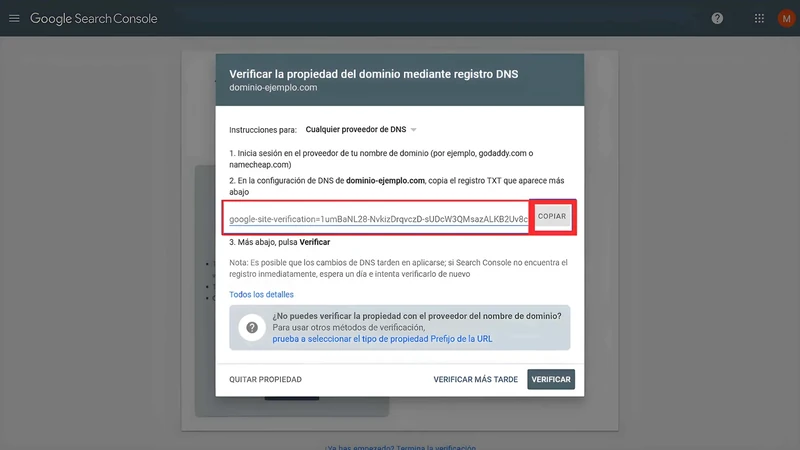
After clicking “Continue”, Google Search Console will ask you to verify ownership of your domain via a DNS record. At this step, you'll see a message similar to the one in the image, giving you a verification code.
Verifying domain ownership
- Copy the code Google gives you.
- Log in to your hosting account (in this case, we'll use Hostinger).
- Go to the Advanced section and then open the DNS Zone Editor.
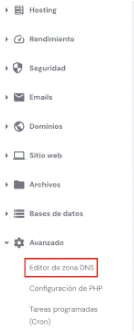
Once you've opened the DNS Zone Editor in your Hostinger control panel, follow these steps:
- Select the option to add a new DNS record and choose TXT as the record type.
- In the TXT value field, paste the verification code you copied earlier from Google Search Console.
- Click Add record to save the changes.
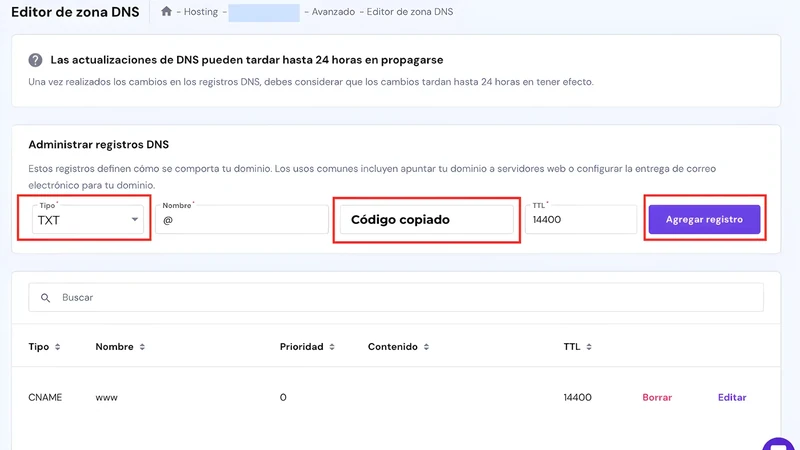
This process can take a few minutes to take effect, as DNS records may need time to propagate across the network. Once it's done, you'll be able to verify your property in Google Search Console.
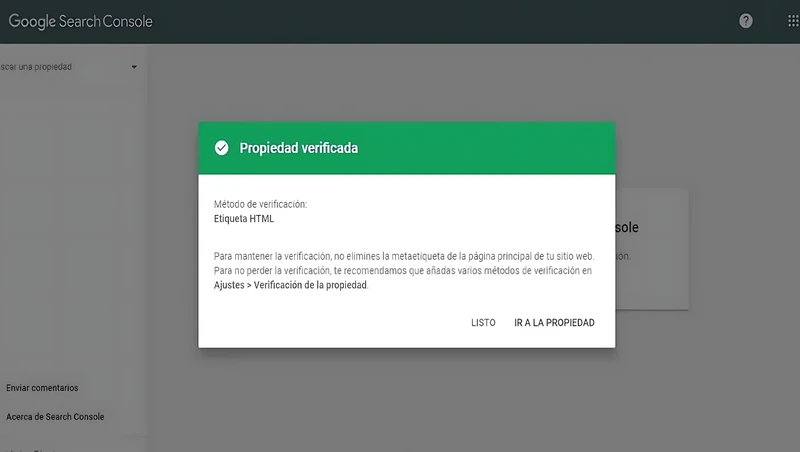
From now on, you can start using Google Search Console to access valuable information about your website's performance. The tool lets you monitor how users interact with your content, identify possible technical SEO issues and optimise your website's rankings in Google's search results. You'll also be able to review the queries your website appears for on Google, detect possible crawl errors and much more.

Written by
Technical SEO at Landing Agency
On Landing's SEO team since 2023: keywords, site architecture and technical improvements on client websites. Computer engineering background.
See their profile and all their articles