



A complete guide to setting up Google Analytics 4 on your real estate website
How to set up Google Analytics 4 to find out where your website visitors come from and what they do before contacting you.

In this article 4 sections
Did you know you can significantly improve conversions at your real estate agency if you know how to measure the right data? In this guide you'll learn how to set up Google Analytics 4 (GA4) specifically for the real estate sector, so you can analyse your website traffic and make strategic decisions based on reliable data.
Below is a video in which Lluís Jiménez, head of SEO at Landing Agency, guides you step by step through setting up Google Analytics 4 on your real estate website. In the same video he also explains how to set up Google Search Console.
What is Google Analytics 4 (GA4)?
GA4 is a free tool developed by Google to track visits and interactions on your real estate website or apps in detail. Its key advantage is that it gives you a complete view of user behaviour, from the number of visits to the most viewed properties or the most searched-for areas.
The real estate sector generates a huge amount of data, and GA4 lets you make the most of it. From finding out which types of property attract the most visitors to analysing the demographic profile of people interested in buying property, this tool gives you the information you need to adapt your strategies and optimise your business results.

Key differences between GA4 and Universal Analytics (UA)
For those who have been using Universal Analytics (UA) on their real estate website, GA4 brings a number of important improvements that let you track your site's performance in more depth and more accurately:
- User interactions: Whereas UA used the term “hits” to describe actions such as page views or events, GA4 simplifies this by calling all interactions “events”, making it easier to build custom reports and understand the behaviour of users interested in buying or renting property.
- Multiple data sources: In GA4, you can connect multiple data streams (for example, if you also have a mobile app to showcase properties), giving you a unified view of user behaviour across both your website and the app, all in one place.

Universal Analytics stopped processing data in July 2023 and Google shut off access to its reports in July 2024: today GA4 is the only version. If your website's code still carries a tag starting with “UA-”, it isn't measuring anything.
How to set up Google Analytics 4 for your real estate website
- Create a GA4 account
- Create a GA4 property
- Provide your business details
- Provide your business objectives
- Create a data stream
- Install the tag on your website
- Mark enquiries as key events

1. Create a GA4 account
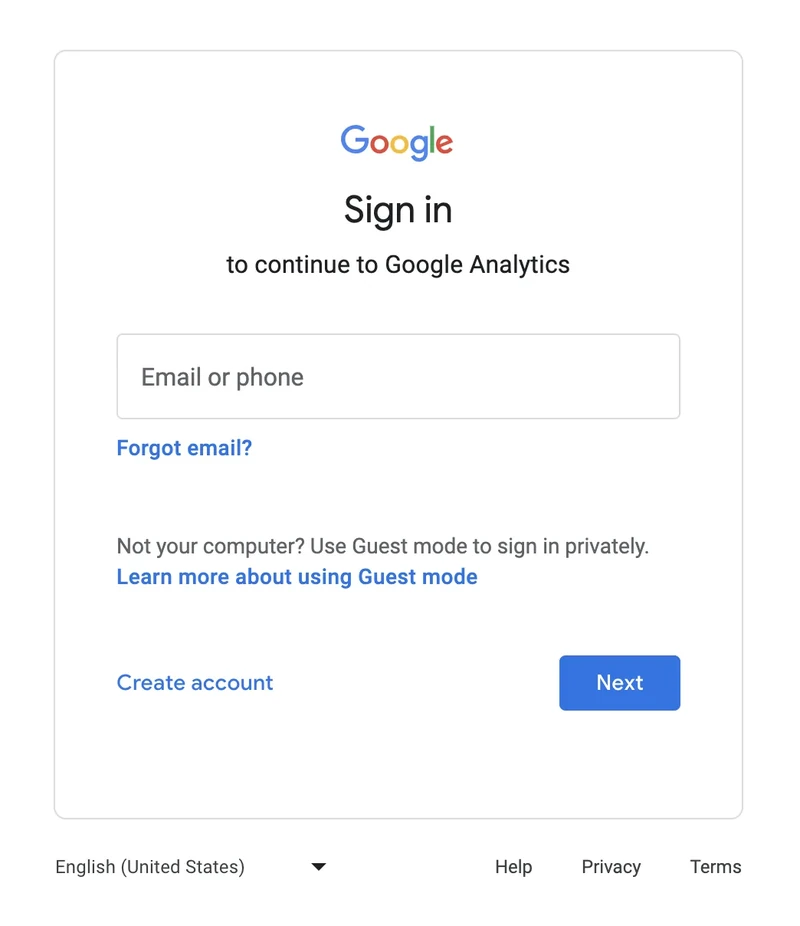
The first step is to create a Google Analytics account if you don't have one yet. Go to Google Analytics and sign in with your Google account.
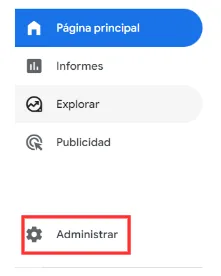
Once we've signed in, we go to the “Admin” section (the cog icon) and select “Create account”.
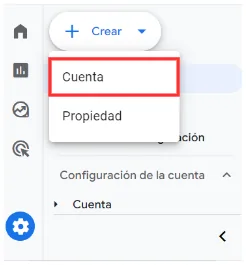
Next, in the admin panel, click “+ Create” > “Account” to create your Google Analytics account.
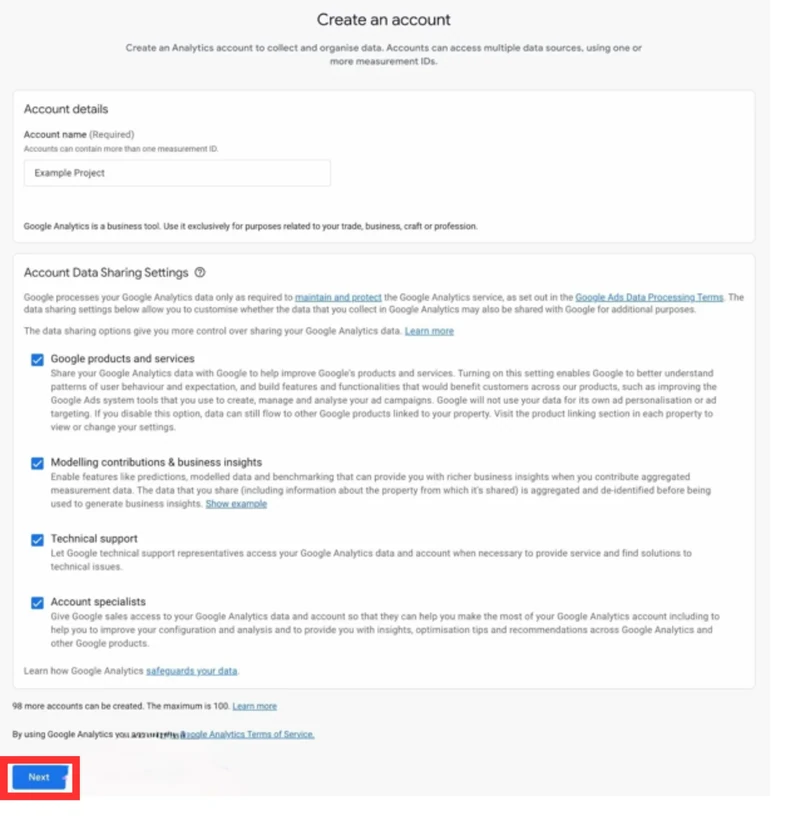
Give your account a name (for example, “Real estate analytics”) and adjust the data sharing settings to suit your preferences. Then click “Next” to continue.
2. Create a property for your real estate agency in GA4
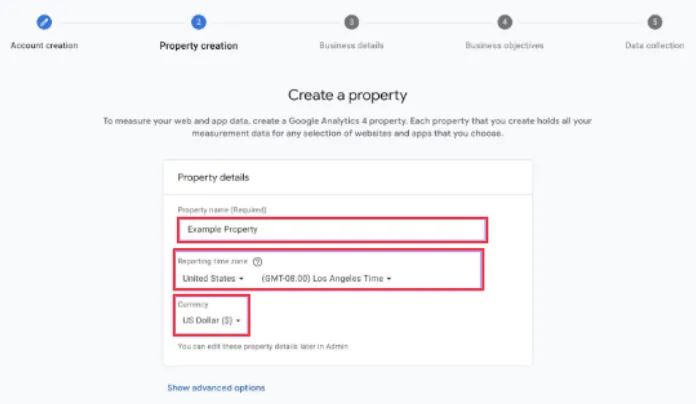
Properties in GA4 are what collect and organise your website's data. If your real estate agency has only one website, set up one property for it. If you also have an app to showcase your listings or manage bookings, you can bring everything together in a single property.
The property name should reflect your business. Choose the time zone and currency you'll use in your reports so the data fits your local needs.
3. Fill in your business details
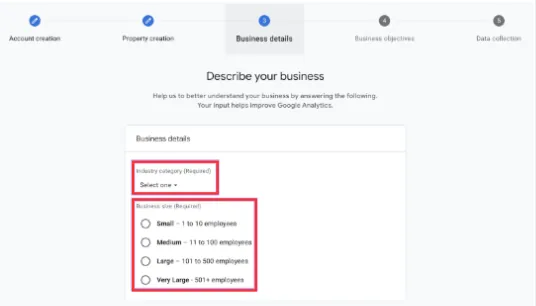
Next, you'll need to enter some details about your business. Choose the category that best fits the real estate sector and set your business size so Google can tailor the reports to what your business needs.
4. Define your real estate goals
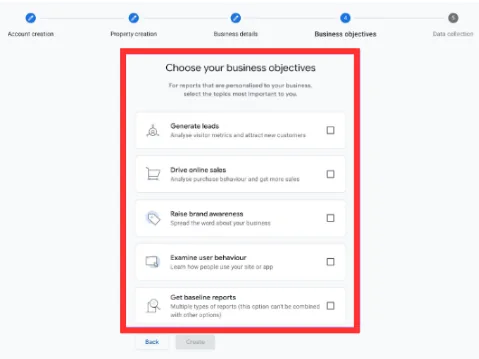
The next step is to set your real estate agency's objectives in GA4. For example, you might focus on getting more quality enquiries or increasing conversions from visitors interested in specific properties. These objectives let GA4 tailor its reports to reflect what matters most to your business.
Don't forget to review and accept the terms of service before you continue.
5. Create a data stream for your real estate website
Finally, you'll need to create a data stream, which is what allows GA4 to collect information from your website. If your data source is a website, select “Web”, enter your domain (for example, “www.tuinmobiliaria.com”) and give the stream a name, such as “Real estate website traffic”.
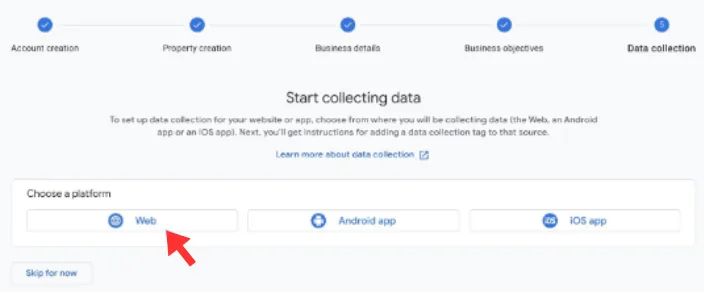
Once it's created, you'll get a Measurement ID, which you'll need to connect GA4 to your website. It isn't secret (it will end up visible in your website's code), but keep it to hand for the next step.
6. Install the tag on your website
With the Measurement ID (it starts with “G-”) you can now connect your website. There are three common ways to do it: paste the Google tag into the code of every page, use Google Tag Manager or, if your website runs on WordPress, a plugin that does it for you. To check it works, open your website and look at GA4's Realtime report: your visit should appear almost instantly.
7. Mark enquiries as key events
What matters to a real estate agency isn't visits, but the ones that turn into enquiries. Track form submissions, clicks on your phone number and clicks on WhatsApp, and mark them as key events (the name GA4 has used since 2024 for what used to be called conversions). From then on, every report tells you which channel brings enquiries, not just traffic.

Written by
Head of SEO at Landing Agency
From senior technical SEO to Landing's director of operations. Back leading SEO so that your agency is the first in its city.
See their profile and all their articles